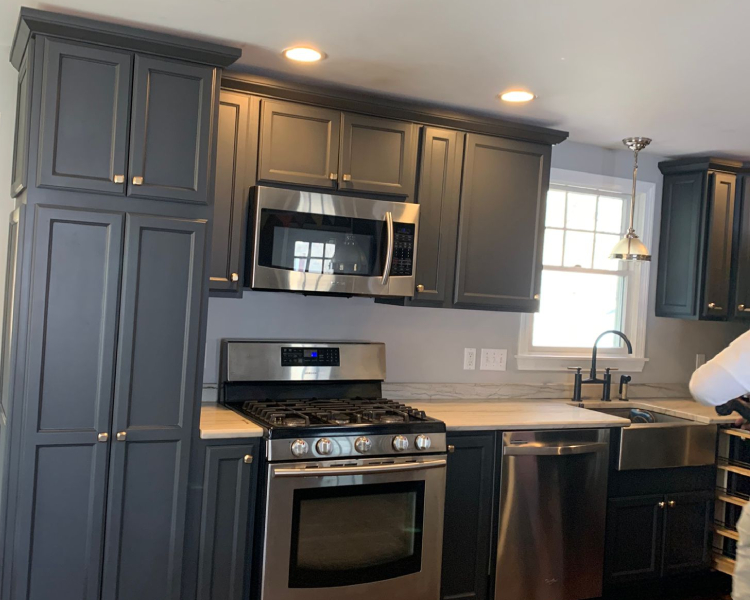
Are you wanting to change your kitchen, but don't know what to do?
How about painting the cabinets? With that in mind, we put together an article to explain a little about the processes
Benefits of painting my kitchen cabinet

The process of painting kitchen cabinets is not at all complicated, but it does require some knowledge about how to proceed.
One of the benefits of deciding to paint my kitchen cabinets would be to renovate my kitchen and make it more beautiful, in addition to protecting and giving more durability to the cabinet that has already been used for a few years.
In addition to fixing some scratches and dents that over the years appear due to the constant use of these cabinets and the food that is being stored in them, I am even able to create a friendly environment for my little girl and make her feel more comfortable when she enters the kitchen.
In this article I will explain what should be done when preparing your cabinet for painting and how we can avoid some mistakes. First of all, I must make the cleaning of the cabinet.
Cleaning
Deep cleaning is fundamental in the final result and in the durability of the painting
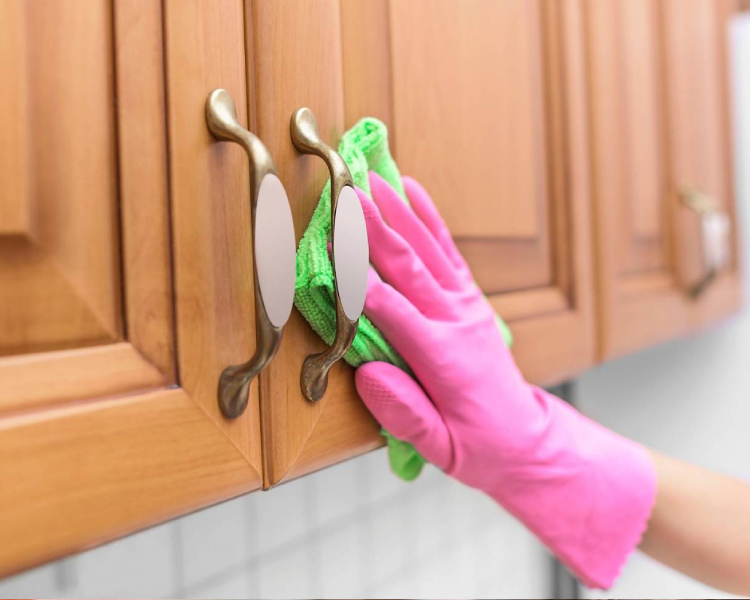
To do this, I will first use a vacuum cleaner. The advantage of using this type of vacuum cleaner is that it will get rid of dust and dirt in every corner and nook that has accumulated there over time. After this, I can remove any objects from my cabinets and organize them to make the paint job more efficient. It is important to keep in mind that after painting some items may be in our way and may not be properly placed on the kitchen cabinet afterwards, so it is better to remove them and take them out of the kitchen.
Now that I have finished cleaning the interior of my cabinets, the next thing I must do is to remove any stickers or objects stuck in my cabinets from years ago. To do this, I will use a solvent or any other product that can eliminate adhesive without damaging the wood or plastic on which it is attached.
After all these steps are done, it is time to make adjustment to our walls so that they are perfectly painted in white. If we do not want to paint our cabinets only one color, we should choose colors for both our walls and our doors....
Sanding
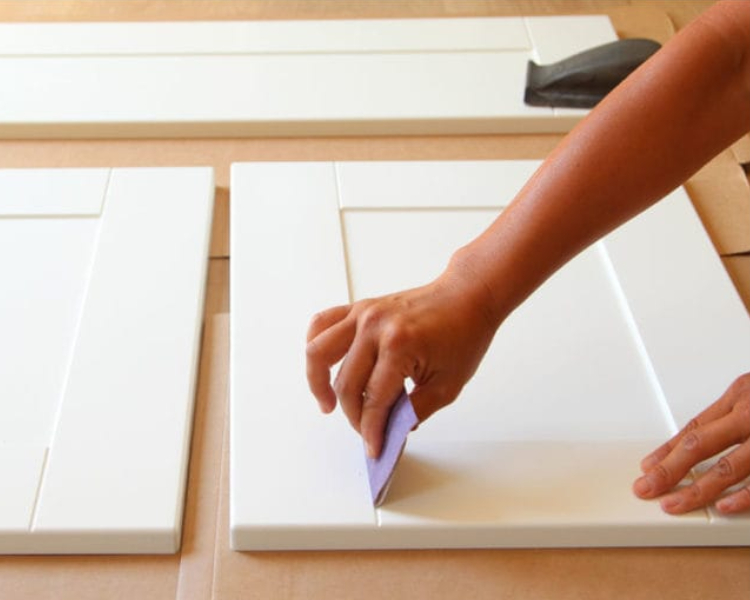
The second step will now be to start sanding. You have the option of using a sanding machine or sandpaper, the secret is you sand the entire surface you are going to paint, remove the doors and drawers first. You may come with a sanding media to remove and fix the problem and prepare the surface so it has more adhesion to the wood.
You should sand it to remove the protective shine that comes from the factory. Don't file more than necessary: you don't want to create a hole in the wood.
Apply primer
Choosing a good primer is essential for the final result and durability. You can choose a latex prime, or an oil-based one, with oil being the most suitable, as it is stronger and prevents the yellow from appearing in the wood.
It adds one more step to the process, but it does an excellent job of sealing the cabinets and preparing them for the final painting, he says. Start at the back of the cabinet frame and work your way out. Cover all surfaces and edges inside the cabinet at the same time and be very careful not to overpaint them or put too much paint on the brush.
It is indicated before each step that you are going to paint you to pass a finer sandpaper to have a better final result
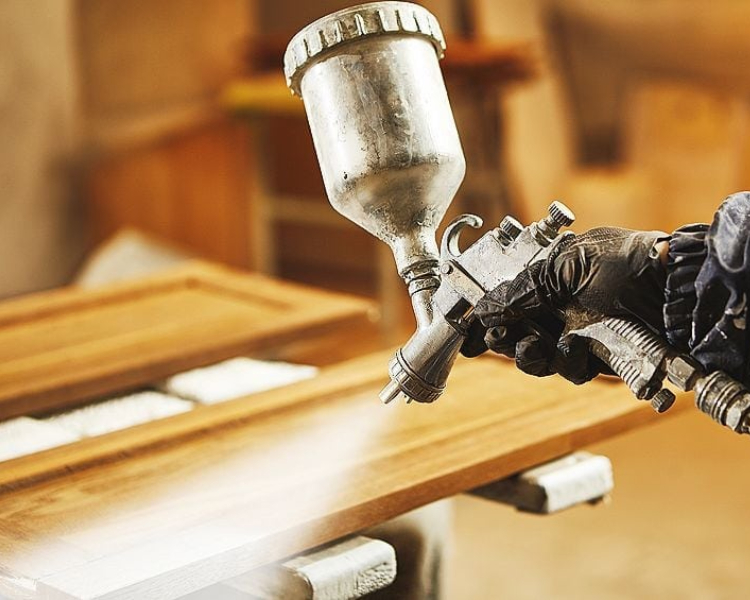
You can choose to paint with a brush, roller or an air spray machine, the spray machine is suitable for those who have experience using the machine.
A good rule of thumb is to never dip your brush more than half an inch into the paint, says MacFarlane. He advises using a brush called the strip tool or angled brush. Brush strokes are very important when painting cabinets: you should drag the brush a minimum of 30 centimeters at a time in a long, smooth line, rather than going back and forth, to ensure a smooth finish.
Apply the first and second coats of paint
We have reached the final stage. Remembering that it is recommended that you sand it for the last time before applying the coat finish. Then clean with a dry cloth or use the vacuum.
First, choose the right paint finish: a semi-gloss or durable gloss is best for kitchen cabinets because a gloss makes the paint harder and therefore more resistant to nicks and chips. Again, it's important at this stage not to put too much paint on the brush. If you do this and the paint drips, it will be difficult to fix if you don't see it right away.
To protect yourself from sandpaper fumes, wear a mask that covers your mouth and face. After applying the first coat, wait at least eight hours — or preferably overnight — before applying a second coat. It may be dry to the touch, but it still isn't completely cured against the surface, he says.
It's pretty much a guarantee that you'll need to apply a second and maybe even a third coat, as you'll likely see fine streaks in a single coat. (You're probably starting to realize now that painting kitchen cabinets isn't the weekend project you were hoping for.)
Assemble the kitchen back
Let the final layer dry for at least eight hours (or overnight) before putting the cabinets back together. A good way to check if they're done: put the first drawer in and push it closed, then open it again. If it makes a ticking sound, it means the paint is sticking and you haven't waited long enough.
Once you're sure you've waited long enough and are putting everything back in its place, put on the new handles and enjoy your newest closet. If you prefer to hire a professional cabinet painting company, you can contact us.